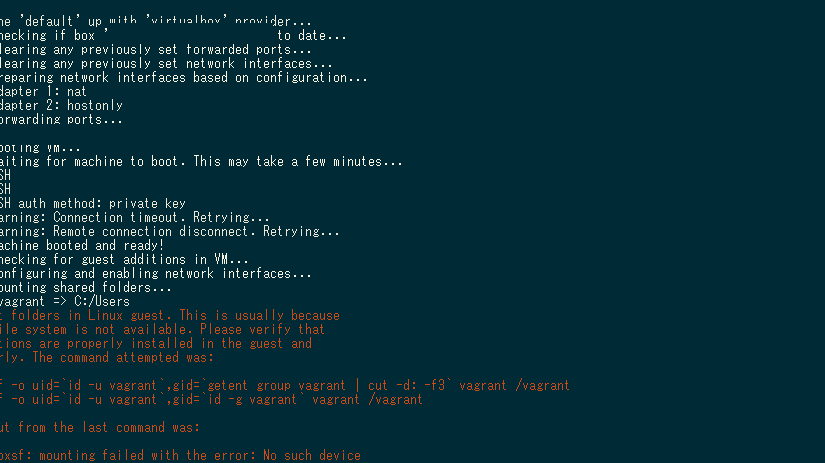
$ vagrant up
で画像と以下のようにマウント時に動かなくなってしばらく待ったらエラーが表示されました。
|
1 2 3 4 5 6 7 8 9 10 11 12 13 14 15 16 17 18 19 20 21 22 23 24 25 26 27 28 29 30 31 32 33 |
$ vagrant up Bringing machine 'default' up with 'virtualbox' provider... ==> default: Checking if box 'centosxx' is up to date... ==> default: Clearing any previously set forwarded ports... ==> default: Clearing any previously set network interfaces... ==> default: Preparing network interfaces based on configuration... default: Adapter 1: nat default: Adapter 2: hostonly ==> default: Forwarding ports... default: xxxx => xxxx (adapter 1) ==> default: Booting VM... ==> default: Waiting for machine to boot. This may take a few minutes... default: SSH address: xxx.xx.xx.xx:xxxx default: SSH username: vagrant default: SSH auth method: private key default: Warning: Connection timeout. Retrying... default: Warning: Remote connection disconnect. Retrying... ==> default: Machine booted and ready! ==> default: Checking for guest additions in VM... ==> default: Configuring and enabling network interfaces... ==> default: Mounting shared folders... default: /vagrant => C:/Users/xxxxxx/centos <span style="color: #ff0000;">Failed to mount folders in Linux guest. This is usually because</span> <span style="color: #ff0000;">the "vboxsf" file system is not available. Please verify that</span> <span style="color: #ff0000;">the guest additions are properly installed in the guest and</span> <span style="color: #ff0000;">can work properly. The command attempted was:</span> <span style="color: #ff0000;">mount -t vboxsf -o uid=`id -u vagrant`,gid=`getent group vagrant | cut -d: -f3` vagrant /vagrant</span> <span style="color: #ff0000;">mount -t vboxsf -o uid=`id -u vagrant`,gid=`id -g vagrant` vagrant /vagrant</span> <span style="color: #ff0000;">The error output from the last command was:</span> <span style="color: #ff0000;">/sbin/mount.vboxsf: mounting failed with the error: No such device</span> |
調べると、対処概要はvboxのリビルド後に再起動という流れでした。
先ずvagrantに接続します。接続は出来るはずです。
|
1 |
$ vagrant ssh |
次にリビルドをしてみました。
|
1 |
$ sudo /etc/init.d/vboxadd setup |
するとGuest Additionsのビルドが失敗したようでした。
|
1 2 3 4 5 6 7 8 9 10 11 |
[vagrant@localhost ~]$ sudo /etc/init.d/vboxadd setup Removing existing VirtualBox non-DKMS kernel modules [ OK ] Building the VirtualBox Guest Additions kernel modules The headers for the current running kernel were not found. If the following module compilation fails then this could be the reason. The missing package can be probably installed with yum install <strong><span style="color: #ff0000;">kernel-devel</span></strong>-2.6.32-573.8.1.el6.x86_64 Building the main Guest Additions module [<span style="color: #ff0000;">失敗</span>] (Look at /var/log/vboxadd-install.log to find out what went wrong) Doing non-kernel setup of the Guest Additions [ OK ] |
カ、カーネルデビル!?
・・・。
・・。
カーネルサンダースさんがご立腹なようなので以下を実行してみました。
|
1 |
$ sudo yum install kernel-devel gcc |
その次にまたリビルドしてみました。
|
1 |
$ sudo /etc/init.d/vboxadd setup |
すると今度はOpenGLの箇所で失敗しました。↓
|
1 2 3 4 5 6 7 8 9 |
[vagrant@localhost ~]$ sudo /etc/init.d/vboxadd setup Removing existing VirtualBox non-DKMS kernel modules [ OK ] Building the VirtualBox Guest Additions kernel modules Building the main Guest Additions module [ OK ] Building the shared folder support module [ OK ] Building the OpenGL support module [<span style="color: #ff0000;">失敗</span>] (Look at /var/log/vboxadd-install.log to find out what went wrong. The module is not built but the others are.) Doing non-kernel setup of the Guest Additions [ OK ] Starting the VirtualBox Guest Additions [ OK ] |
これを解消する為にこの手順を参考にしてみましたが、該当箇所がないようなのでスルー。
仕方ないのでこの状態でも動くか試したところ、動くみたいです。
|
1 |
$ vagrant reload |
で、起動しますたという・・・。(なんやねん!
こんなんばかりですわぁホンマ・・・。
完
参考にさせていただいたサイト様
=>http://qiita.com/osamu1203/items/10e19c74c912d303ca0b
=>http://tech.withsin.net/2015/07/10/virtualbox-vagrant-mount-fail/


コメント
[…] このページのカーネルさんをやってないとインストールエラーが出るような気がします。 […]
[…] =>Vagrant upでmounting failedになった場合の対処方法 […]